 Save
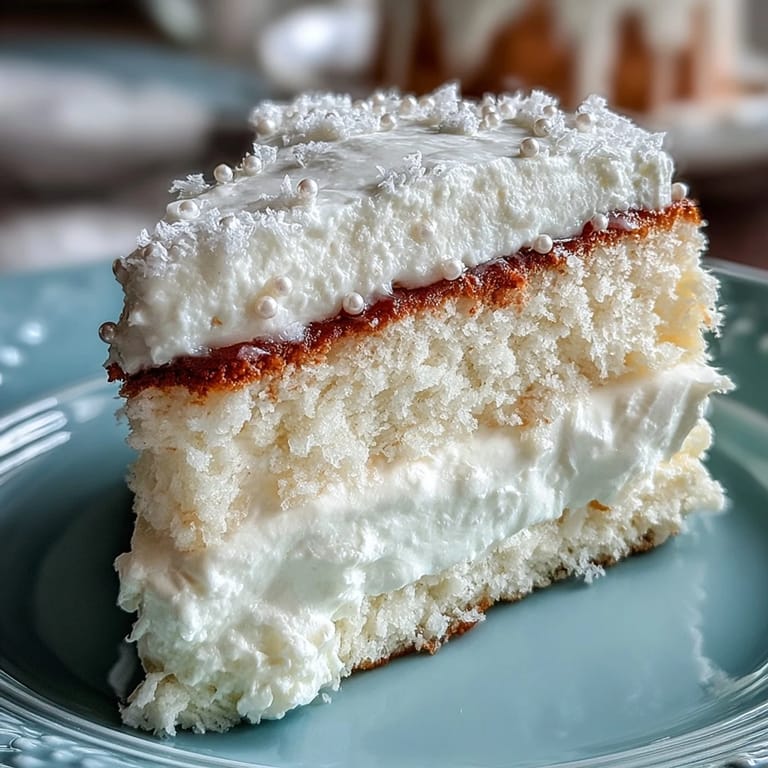
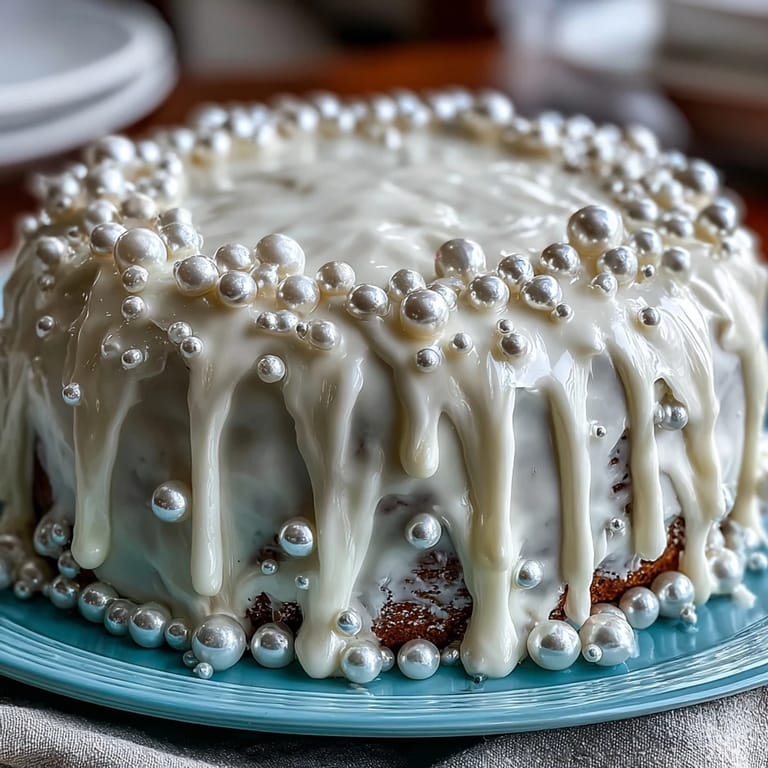
Save My hands were shaking the first time I decorated a cake for someone's milestone moment—it was my cousin's First Communion, and I'd volunteered to make something special without fully thinking through what that meant. The fondant felt foreign under my fingertips, cool and slightly sticky, and I remember standing in the kitchen at dawn, watching the morning light catch on those pearl dust shimmer as I worked, wondering if it would be elegant enough for such an important day. By the time my aunt walked in and gasped, I realized it wasn't about perfection—it was about showing up with care in every smooth edge and carefully placed pearl.
I made this cake again two years later for a different celebration, and this time I wasn't nervous—I was excited, because I knew the fondant would cooperate, that the buttercream would be smooth enough to work with, and that something beautiful would emerge from the effort. There's something grounding about repeating a dish you've already conquered, about knowing your hands have done this before.
Ingredients
- All-purpose flour (3 cups): The foundation of tenderness—don't sift aggressively, just whisk it gently with the baking powder and salt so you avoid overworking the flour before it even hits the wet ingredients.
- Granulated sugar (2 cups): This creams with butter into the light, fluffy base that keeps your cake delicate and moist through the decorating process and beyond.
- Unsalted butter (1 cup for cake, 1 cup for buttercream): Room temperature butter is non-negotiable—cold butter won't cream properly, and you'll end up with a dense cake instead of the cloud-like crumb you're after.
- Eggs (4 large, room temperature): Cold eggs break the emulsion and create a lumpy batter, so leave them out for at least thirty minutes, or do what I do and set them in warm water for five minutes.
- Pure vanilla extract (1 tbsp for cake, 1 tsp for buttercream): This is where the flavor lives—don't skimp on the quality, because it's one of the few ingredients people can actually taste.
- Whole milk (1 ¼ cups): The dairy adds richness and moisture, keeping every bite tender even after the cake sits under fondant for a few hours.
- Baking powder (2 ½ tsp): This is your leavening agent, and the amount is calibrated specifically for this ratio of wet and dry ingredients.
- White ready-to-roll fondant (2 lbs): Save yourself the hassle of making fondant from scratch unless you have specific dietary needs—the ready-to-roll version is forgiving and works beautifully.
- Pearl luster dust: This transforms the fondant from flat white to something luminous and sophisticated, catching light in ways that make the cake feel precious.
- Edible pearls or sugar pearls: These are your optional sparkle—use them to create a meaningful design, like a cross or a border that frames the whole cake.
- Powdered sugar (4 cups for buttercream): Sift it before you use it, always, because lumps in buttercream will show through your fondant covering.
Tired of Takeout? 🥡
Get 10 meals you can make faster than delivery arrives. Seriously.
One email. No spam. Unsubscribe anytime.
Instructions
- Prepare your pan and preheat:
- Set your oven to 350°F and give it time to fully preheat while you grease a 12x18-inch sheet pan with a light hand, then line it with parchment paper—this is your insurance policy against sticking. The parchment should cover the bottom and come up the sides a little, so you can lift the cooled cake out without any drama.
- Mix your dry ingredients:
- Whisk the flour, baking powder, and salt together in a medium bowl, making sure everything is evenly distributed so your cake rises consistently. Set this aside and don't touch it again until you're ready.
- Cream butter and sugar:
- In a large bowl or stand mixer, beat butter and sugar together for about three minutes until the mixture turns pale and fluffy, like mousse—this is where you're incorporating air that will make the cake light. Stop and scrape down the sides a few times to make sure everything is getting mixed.
- Add eggs and vanilla:
- Add eggs one at a time, beating well after each addition so the mixture stays emulsified and creamy, then mix in the vanilla. If your mixture looks curdled or broken, don't panic—it'll come back together once you add the dry ingredients.
- Alternate flour and milk:
- Add a third of the flour mixture, then half the milk, then another third of the flour, then the remaining milk, then the last of the flour, mixing gently after each addition until just combined. This technique keeps you from overworking the gluten, which would make your cake tough instead of tender.
- Bake the cake:
- Bake the cake:
- Pour the batter into your prepared pan and smooth the top, then slide it into the oven for thirty to thirty-five minutes—it's done when a toothpick poked in the center comes out clean with maybe a crumb or two clinging to it. The kitchen will smell like heaven at this point.
- Cool the cake:
- Let it rest in the pan for ten minutes so it firms up enough to handle, then turn it out onto a wire rack and let it cool completely—this takes patience, but warm cake under fondant will cause problems. Use this time to make your buttercream so it's ready when you need it.
- Make the buttercream:
- Beat softened butter until creamy, then gradually add sifted powdered sugar, milk, vanilla, and a pinch of salt, beating until the whole thing is fluffy and smooth. Taste it and adjust the vanilla if you'd like it more pronounced.
- Crumb coat the cake:
- Once the cake is completely cool, spread a thin, even layer of buttercream over the entire surface and sides—this seals in any loose crumbs so they don't end up in your fondant. Let this chill for about fifteen minutes while you prep your fondant.
- Roll and drape the fondant:
- On a surface lightly dusted with powdered sugar, roll out your fondant to about an eighth of an inch thick, then carefully lift and drape it over the cake, smoothing it gently with your hands or a fondant smoother. Take your time here—you're not in a rush, and fondant is forgiving if you work slowly and patiently.
- Trim and finish:
- Use a sharp knife to trim the excess fondant away from the bottom, then brush the surface lightly with water where you want to adhere edible pearls or decorations. Use a dry food-safe brush to dust on the pearl luster dust in whatever pattern feels right—swirls, all over, or just highlights.
- Add decorative elements:
- Arrange edible pearls to create your Communion design, whether that's a cross, a chalice, or a delicate border around the edge. If you want extra shine, lightly brush with a mixture of corn syrup and water, but use a very light touch so you don't disturb the luster dust.
- Let it set:
- Give the cake thirty minutes to set before you serve it, so the fondant firms up and everything feels stable and elegant.
 Save
Save What I didn't expect was how the cake would become a memory itself—not just food on a table, but something my cousin still talks about, something that marked a moment in her life. The fondant was beautiful, yes, but what mattered was that I showed up early and stayed late to make it happen.
Why Fondant Feels Intimidating (But Isn't)
Fondant has a reputation for being fussy and difficult, but the truth is it's one of the most forgiving mediums in the kitchen—it doesn't require precision like pastry, and mistakes are easily hidden. I spent years avoiding it because I thought I needed some special talent, then one day I just rolled some out and draped it over a cake, and it worked. The fondant wants to cooperate; you just have to give it time and handle it gently, the way you'd handle something delicate and precious.
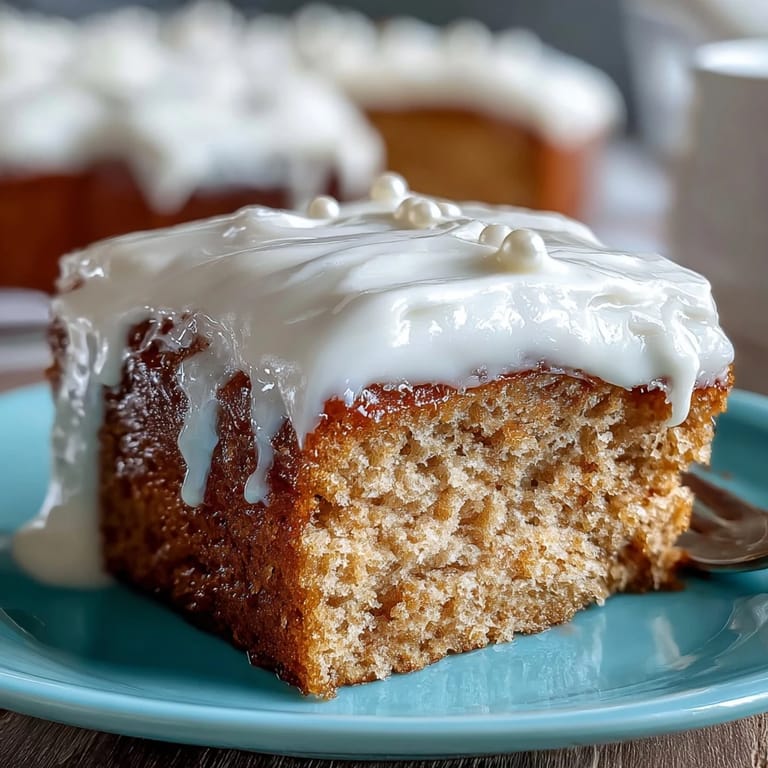
The Flavor Under the Glamour
This cake gets its real power from the buttercream layer between the cake and the fondant—that's where the richness lives, where you taste real butter and vanilla instead of just sweetness. Some recipes treat the cake as decoration, but this one insists that what's underneath matters as much as what's on top. The moist crumb stays tender for days, so you're not serving someone a dry disappointment wrapped in pretty packaging.
Timing and Flexibility
One of the kindest things about this cake is that you can bake it a full day ahead, wrap it tightly, and decorate it whenever you're ready, which means you don't have to do everything in a frantic rush the morning of your event. This also gives you time to think about your design, to sketch out where the pearls will go, to approach the fondant work with calm instead of chaos. If you're decorating the day of, just remember that fondant takes about thirty minutes to set properly, so factor that into your timeline and don't panic if it looks soft right after you finish—it will firm up.
- Bake one day ahead, decorate the day you need to serve, and you'll feel relaxed instead of rushed.
- Keep your fondant in an airtight container until you're ready to use it, or it will dry out and crack.
- If you're working in a warm kitchen, the fondant might get sticky—a small dust of powdered sugar on your hands helps, but don't overdo it.
 Save
Save This cake deserves to be on a table at a celebration, catching light and making someone feel special. Make it with presence, and it will carry that presence forward in every bite and every photograph.
Recipe FAQs
- → What is pearl fondant and how is it applied?
Pearl fondant is a smooth, pliable icing mixed with edible pearl luster dust to give a shimmering finish. It is rolled thin and carefully draped over a cooled buttercream-covered cake for a sleek, elegant appearance.
- → How can I ensure the cake stays moist after baking?
Using butter and whole milk creates a tender crumb, and it’s important not to overmix the batter. Cooling the cake completely before decorating helps preserve moisture and texture.
- → Can the fondant be decorated with edible pearls?
Yes, edible sugar pearls can be gently adhered to the fondant surface using a small amount of water or light corn syrup for added decoration and shine.
- → What alternatives can be used to vanilla for flavoring?
Almond extract can substitute half of the vanilla for a subtle nutty flavor that complements the sweetness of the cake and fondant.
- → How long should the cake set before serving?
After applying the fondant and decorations, it’s best to let the cake set for about 30 minutes to ensure the coating firms up and decorations hold in place.
- → What pan size is recommended for baking this cake?
A 12x18-inch half-sheet cake pan is ideal to achieve the proper thickness and cooking time for even baking.