 Save
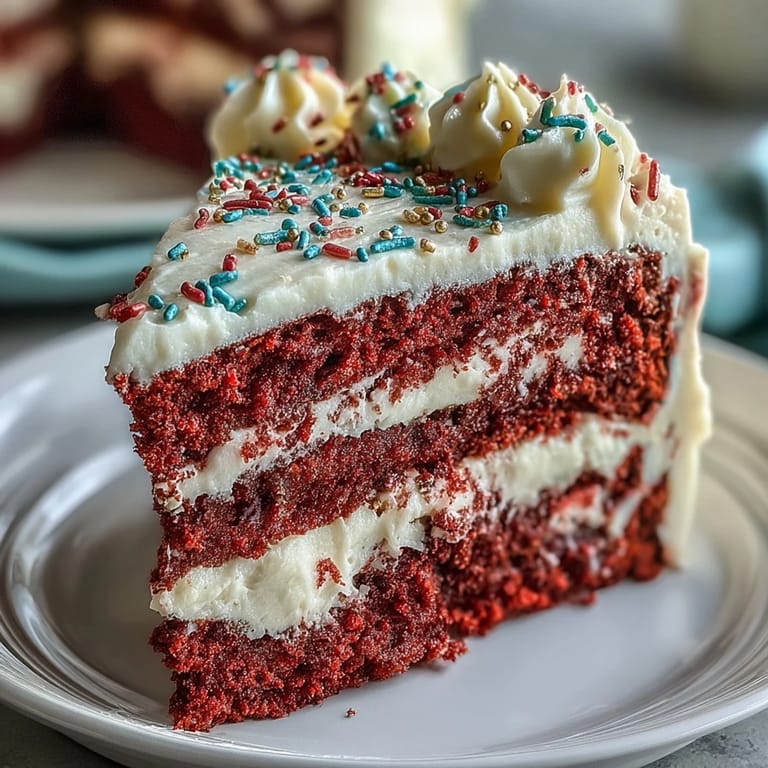
Save The first time I encountered a red velvet cake was at a friend’s birthday party during a summer barbecue. The electric hue of the cake seemed to electrify the dessert table, drawing everyone in with its vibrant color and tantalizing aroma. I still remember the sound of laughter mingling with the clinking of forks, a perfect backdrop to the joy that cake brings. I was fascinated by how such a simple combination of ingredients could create something so visually stunning and delicious. From that moment on, I knew this was a cake I had to master for my own celebrations.
On one particular Juneteenth celebration, it was my turn to bring dessert, and I chose this red velvet cake. As I poured the vibrant batter into the pans, I felt a wave of pride, knowing I was contributing a traditional dish that celebrates heritage and hope. The moment the cake emerged from the oven, filling the kitchen with its rich scent, I could hardly wait to share it. When everyone gathered around the table to indulge in the cake, their smiles and compliments made every bit of effort worthwhile. This cake had transformed from just dessert into a joyful storyteller of family and tradition.
Ingredients
- All-purpose flour: Essential for the cake's structure and texture; be sure to sift it for the best results.
- Granulated sugar: Adds sweetness and helps create a moist texture in the cake.
- Baking soda: Don't skip this, as it helps the cake rise for that light, fluffy feel.
- Cocoa powder: Just a hint elevates the flavor, providing depth without overwhelming the signature red hue.
- Vegetable oil: Keeps the cake moist; it’s the secret behind the cake’s tender crumb.
- Buttermilk: This not only adds flavor but also reacts with the baking soda for leavening.
- Red food coloring: A little transforms the cake into a stunning centerpiece; feel free to adjust for a deeper color.
- Distilled white vinegar: This reacts with the baking soda to enhance fluffiness.
- Cream cheese: A must for rich, tangy frosting that complements the sweetness of the cake perfectly.
- Powdered sugar: Creates the ideal smooth texture for frosting; make sure to sift it to avoid lumps.
Tired of Takeout? 🥡
Get 10 meals you can make faster than delivery arrives. Seriously.
One email. No spam. Unsubscribe anytime.
Instructions
- Preheat and Prepare:
- Set your oven to 350°F (175°C) and grease two 9-inch round cake pans. This prep ensures a smooth release once baked.
- Mix the Dry Ingredients:
- In a bowl, sift together the flour, sugar, baking soda, salt, and cocoa powder. This step makes the cake light and airy!
- Combine the Wet Ingredients:
- In a separate bowl, whisk together the oil, buttermilk, eggs, food coloring, vinegar, and vanilla. It’s like a color palette coming together—wonderful!
- Blend Together:
- Gradually fold the dry ingredients into the wet mixture. Take care not to overmix; we want to keep it fluffy!
- Bake the Cakes:
- Divide the batter evenly between the prepared pans and bake for 28-32 minutes. Your kitchen will smell heavenly!
- Cool Down:
- Let the cakes cool in the pans for 10 minutes, then transfer them to a wire rack. Patience is key here!
- Make the Frosting:
- Beat together cream cheese and butter until fluffy, then add powdered sugar, vanilla, and a pinch of salt. This is where the magic happens!
- Assemble the Cake:
- Once cooled, spread a layer of cream cheese frosting between the layers and cover the top and sides with the remaining frosting. Garnish with sprinkles if you’re feeling fancy!
 Save
Save 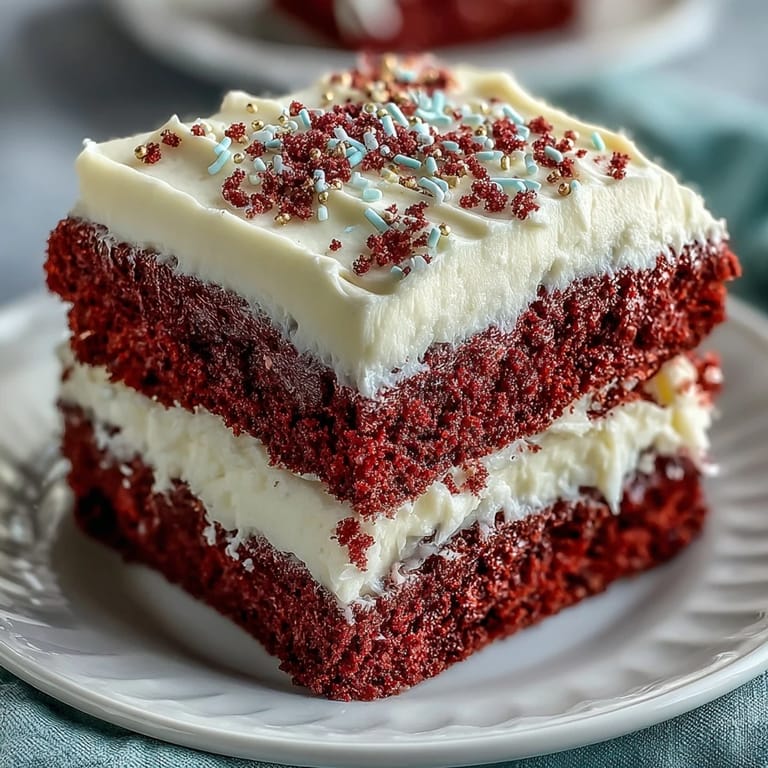 Save
Save This cake transcended the usual dessert; during each cut, stories were shared, laughter echoed, and the past was celebrated. It grew to symbolize warmth and connection at family gatherings, weaving together generations through a simple slice of cake.
Behind the Rich Color
The striking red color is not just a show-stopper; it carries meaning and tradition deeply rooted in Southern history. Each slice reminds us not just of sweet indulgence but of cultural identity and resilience, making it so much more than just dessert.
Perfect for Any Occasion
While it shines during Juneteenth, this cake serves beautifully at birthdays, holidays, and office parties, always drawing compliments and smiles. There’s something about its appearance and flavor that just makes everything feel a bit more special.
Extra Tips for Baking Success
Always ensure your ingredients are at room temperature for easier mixing and better results.
- Consider using a toothpick to check for doneness; it should come out clean.
- Keep your cake layers as even as possible for a beautiful presentation.
- Store leftover cake in the fridge to keep it fresh and moist.
 Save
Save 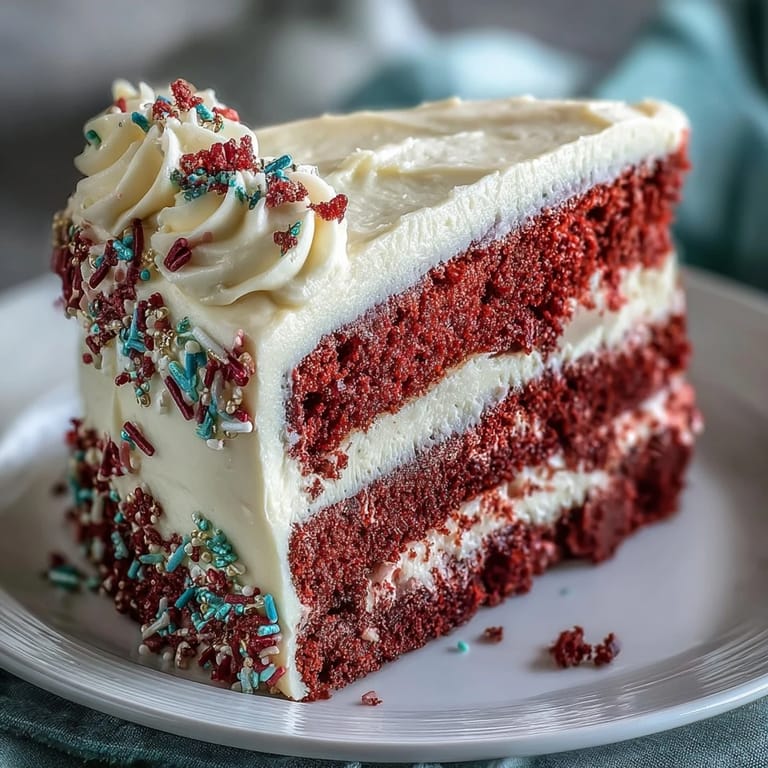 Save
Save Creating this beautiful red velvet cake is not just baking; it’s a chance to weave family and tradition into every forkful. Enjoy each slice, and share the joy it brings!
Recipe FAQs
- → What is the significance of red velvet cake for Juneteenth?
Red velvet cake is often associated with Southern celebrations, and its vibrant color represents resilience and joy, making it a fitting choice for Juneteenth observances.
- → Can I make this cake ahead of time?
Yes, this cake can be prepared one day in advance and stored in the refrigerator. Just cover it to keep it fresh.
- → What are some variations for the cream cheese frosting?
You can enhance the cream cheese frosting by adding orange zest for a citrus twist or even experiment with different extracts like almond or lemon.
- → Is this cake suitable for vegetarians?
Yes, this recipe is vegetarian-friendly as it contains no meat or meat byproducts.
- → How can I store leftovers?
Store any leftover cake covered in the refrigerator for up to a week. Just be sure to keep it in an airtight container to maintain freshness.