 Save
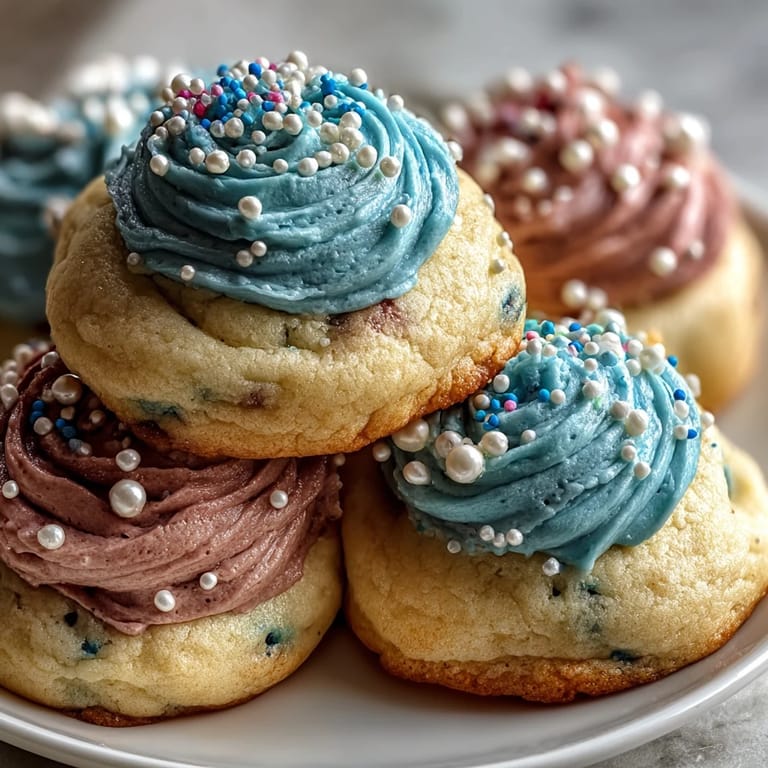
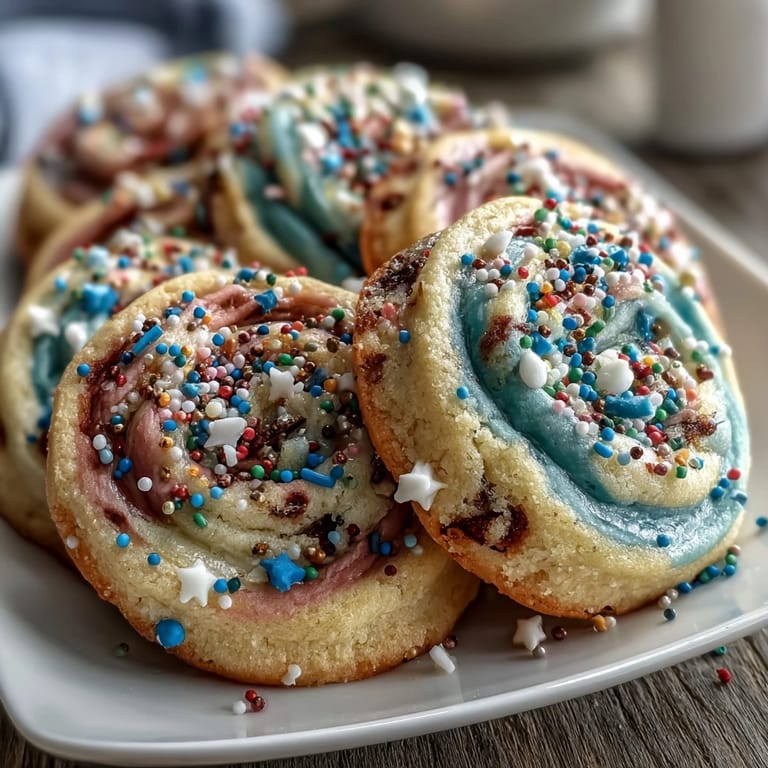
Save My niece showed me a screenshot from Cookie Run Kingdom one afternoon, pointing at these impossibly perfect pastel swirl cookies with the kind of wonder only a seven-year-old can muster. She wanted them for her birthday, so I spent that evening experimenting in my kitchen, twisting colored doughs together until my fingers ached in the best way. When those first cookies came out of the oven with their soft centers and swirled edges, she gasped like I'd actually baked magic. Turns out, sometimes the most meaningful recipes are born from someone else's joy, not your own nostalgia.
I'll never forget watching my niece's friends huddle around the cookie platter at her party, each one picking their favorite color combination like they were choosing from a bakery display case. One kid asked if I'd gone to culinary school, which made me laugh so hard I nearly dropped the whole tray. That's when I realized these cookies weren't just dessert—they were conversation starters, tiny edible works of art that made an ordinary afternoon feel celebratory.
Ingredients
- All-purpose flour (2 1/2 cups): This is your cookie foundation, and measuring by weight keeps things consistent if you ever decide to bake these again and want identical results.
- Unsalted butter (1 cup, room temperature): Cold butter won't cream properly, so let it sit on the counter for about 30 minutes—patience here means fluffier dough.
- Granulated sugar (1 cup): This sweetness carries the whole show; don't substitute with brown sugar unless you want chewier, darker cookies.
- Baking powder (1/2 tsp): Just enough lift to give these cookies their signature tender crumb without making them cake-like.
- Egg (1 large) and vanilla extract (2 tsp): These bind everything together and provide subtle flavor depth that makes people ask what your secret ingredient is.
- Gel food coloring in pastel shades: Gel coloring won't water down your dough like liquid food coloring would, keeping that perfect soft texture intact.
- Pastel sprinkles (1/4 cup): Optional but they're what make these cookies feel truly festive before they even hit the oven.
Tired of Takeout? 🥡
Get 10 meals you can make faster than delivery arrives. Seriously.
One email. No spam. Unsubscribe anytime.
Instructions
- Mix your dry ingredients first:
- Whisk flour, baking powder, and salt together in a medium bowl until everything is evenly distributed. This prevents streaks of baking powder in your finished cookies.
- Cream butter and sugar until fluffy:
- Beat them together for 2-3 minutes until the mixture looks pale and cloud-like. You'll notice the change immediately—it goes from grainy to almost mousse-like.
- Add your wet ingredients:
- Mix in the egg, vanilla, and almond extract (if using) until fully combined. The dough will look glossy and soft at this point.
- Combine wet and dry gently:
- Fold in your flour mixture slowly, stirring just until you don't see white streaks of flour anymore. Overmixing here leads to tough cookies, which is the opposite of what we're going for.
- Divide and color your dough:
- Split the dough into 3 or 4 portions depending on how many colors you want, then knead a small amount of gel food coloring into each piece until the color is even. Your hands will get stained, which is honestly half the fun.
- Roll colored portions into ropes:
- Shape each colored section into a long rope about 12 inches—think of it like making a thick snake of dough. Don't worry about perfection; rustic is beautiful here.
- Twist and create your log:
- Gently twist the colored ropes together, then roll the whole thing into a log shape. If it gets too long or unwieldy, slice it in half and wrap each piece separately.
- Chill your dough thoroughly:
- Wrap the log in plastic wrap and refrigerate for at least 2 hours. This time in the cold makes your cookies hold their shape better during baking and prevents them from spreading into puddles.
- Preheat and prepare:
- Set your oven to 350°F and line baking sheets with parchment paper. Cold, properly prepared baking sheets make all the difference in even cooking.
- Slice and arrange:
- Cut the chilled dough into 1/4-inch thick rounds—not too thin or they'll be crispy, not too thick or the centers won't bake properly. Space them about 2 inches apart on your prepared sheets.
- Add sprinkles if desired:
- Top each cookie with a pinch of pastel sprinkles before baking. They'll partially melt into the warm cookie, creating little pockets of color.
- Bake with attention:
- Bake for 10-12 minutes until the edges just barely turn golden. This is crucial—pull them out a touch early rather than waiting for the centers to darken, because they continue cooking on the hot pan.
- Cool properly:
- Let cookies rest on the baking sheet for 5 minutes so they set slightly, then transfer to a wire rack. Patience here prevents them from breaking apart when you move them.
 Save
Save There's something magical about watching someone bite into a cookie and see the swirled colors inside for the first time. My niece's friend literally said "it's too pretty to eat" before devouring three in a row, and I think that's the highest compliment a cookie can receive.
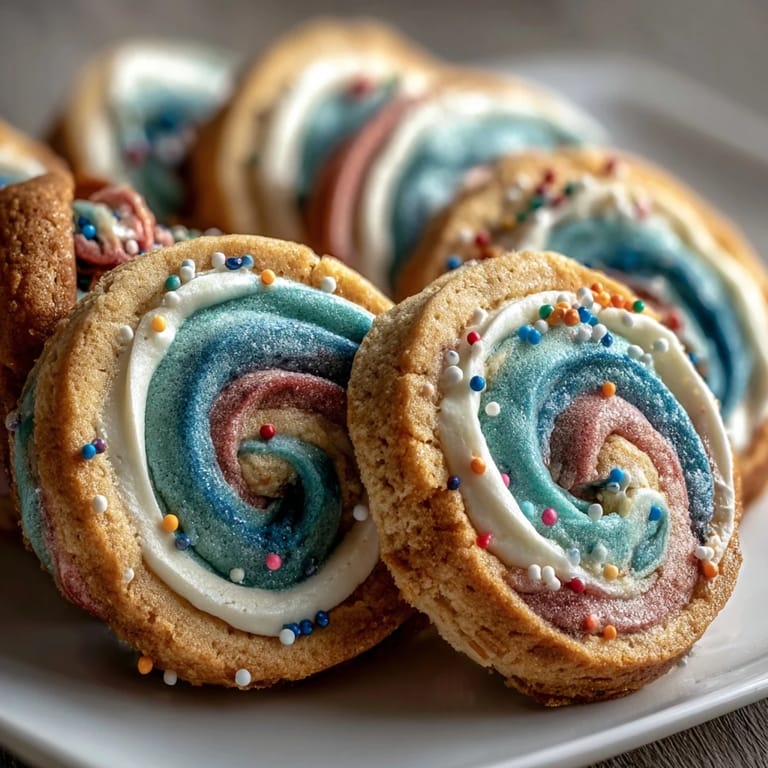
The Art of the Swirl
The swirl technique looks complicated but it's really just controlled chaos—the key is not twisting too tightly or you lose the marbled effect, but not loosely enough that the colors don't blend visibly. I discovered this by accident when I was rushing and didn't twist hard enough; the result was actually more visually interesting than my first attempt where I went overboard. Now I aim for that sweet spot where the colors spiral through each other but maintain their distinct identity.
Storage and Longevity
These cookies are surprisingly good keepers when stored right—they stay soft in an airtight container at room temperature for up to 5 days, which means you can actually bake them ahead for parties without stress. I've also frozen them for up to 2 months and honestly couldn't tell the difference when I thawed them; they taste as fresh as the day they came out of the oven. That's when you know you've found a recipe worth keeping around.
Flavor Variations and Personal Touches
While these cookies shine in their plain pastel form, I've experimented with adding lemon or orange zest to the dough for a subtle brightness that makes them taste a little more sophisticated. A friend suggested mixing in a tiny bit of peppermint extract for holiday versions, which I haven't tried yet but I'm absolutely going to. The beauty of this recipe is that the base is so solid you can play around without worrying you'll ruin it.
- Try adding the zest of one lemon or orange to the wet ingredients for a citrus twist.
- A 1/4 teaspoon of peppermint or almond extract elevates the flavor without overpowering the vanilla.
- These cookies also work beautifully with pearl sugar sprinkled on top instead of pastel sprinkles if you want a different texture.
 Save
Save These pastel swirl cookies have become my go-to celebration recipe because they bridge that gap between homemade and fancy-looking—people light up when they see them, and the taste backs up all that visual promise. Whether you're baking for a birthday, a bake sale, or just because you want your kitchen to smell like butter and vanilla, these cookies deliver joy in every bite.
Recipe FAQs
- → How do pastel colors stay vibrant during baking?
Using gel food coloring ensures vivid hues without altering dough consistency, maintaining bright pastel swirls even after baking.
- → Can I add extra flavors to the dough?
Yes, adding citrus zest like lemon or orange can introduce a fresh flavor that complements the buttery base.
- → What is the best way to achieve the swirl effect?
Divide the dough into portions, tint each with different gel colors, roll into ropes, then gently twist before chilling and slicing.
- → How long should the dough be chilled before baking?
Chill the dough for at least 2 hours to firm up, which helps maintain shape and vibrant swirls during baking.
- → What storage methods keep cookies fresh?
Store in airtight containers at room temperature for up to 5 days, or freeze for extended freshness up to 2 months.